Door Hardware Installation: A Complete Homeowner Guide
You've got the new lockset on the table, the old knob is loose in your hand, and the door still won't shut cleanly unless you lift it a little. That's the moment many DIYers think they need more force, when what they really need is a better measurement. Door hardware installation looks like a parts swap until you put the latch against the strike and realize the door, frame, hinges, and hardware all have to agree within a very small margin.
On older Minneapolis homes, that margin is often tighter than people expect. A standards guide used by the trade says hinge and lock jamb squareness should be checked, the gap in the square should not exceed 1/32 inch, and the door-edge-to-frame clearance should be at least 1/16 inch. It also notes SDI's referenced tolerance of 1/16 inch in 36 inches (industry standards guide). Those are millimeter-scale details, but they're exactly why a door can look fine and still refuse to latch after a fresh install.
The other reason this job goes sideways is simpler. A common mistake is starting with the lockset, but the lock is only one piece of a system that includes the door leaf, the frame, the hinges, and the strike. That's why retrofit work on an older house is rarely a clean “swap the knob” job, especially when the bore, backset, or strike location doesn't match the new hardware. In a home where the trim has moved, the hinge screws are tired, or the door has settled, geometry beats appearance every time.
Table of Contents
- Why Door Hardware Installation Is Really a Geometry Problem
- Tools, Measurements, and Prep Before You Drill Anything
- Installing a Deadbolt and Knob From Start to Finish
- Choosing the Right Hardware for Your Door Type
- Why a Fresh Install Still Fails to Latch Properly
- Code, Safety, and the Line You Should Not Cross as a DIYer
- Maintenance, Quick FAQ, and When to Call a Twin Cities Locksmith
Why Door Hardware Installation Is Really a Geometry Problem
A homeowner usually sees the problem at the kitchen table, not at the door. The new deadbolt looks right, the instructions look simple, and the old hardware came off cleanly. Then the latch sits a hair off center, or the bolt catches the edge of the strike, and the job stops feeling like a quick swap.
Door hardware installation is controlled by fit, not just finish. Trade standards call for checking jamb squareness, keeping the square gap within 1/32 inch, and maintaining at least 1/16 inch of door-edge-to-frame clearance, with SDI's referenced tolerance at 1/16 inch in 36 inches (standards guide). If those numbers are off, a well-made lockset can bind or refuse to latch. The hardware may be fine. The door system is not.
What the lock can't fix
A lot of retrofit headaches in older Minneapolis homes come from the geometry around the hardware, not the hardware itself. If the bore is slightly off, the strike is shifted, or the hinge side has sagged, the new lock just inherits the problem. A clean install starts with the frame and the door edge, then works outward to the rosette, latch, and strike.
A clean latch is the result of the door, the frame, and the hardware meeting in the right place at the same time.
The market side points in the same direction. Replacement and upgrade work is part of a large maintenance cycle, not a one-off task. In 2025, the consumer hardware segment was valued at about $19.9 billion and the professional segment at about $2.538 billion, while global residential door hardware sales reportedly grew 6.3% in 2023 to $16.7 billion (market watch). That demand is why so many homeowners end up replacing hardware on doors that were never machined for the new parts in the first place.
Tools, Measurements, and Prep Before You Drill Anything
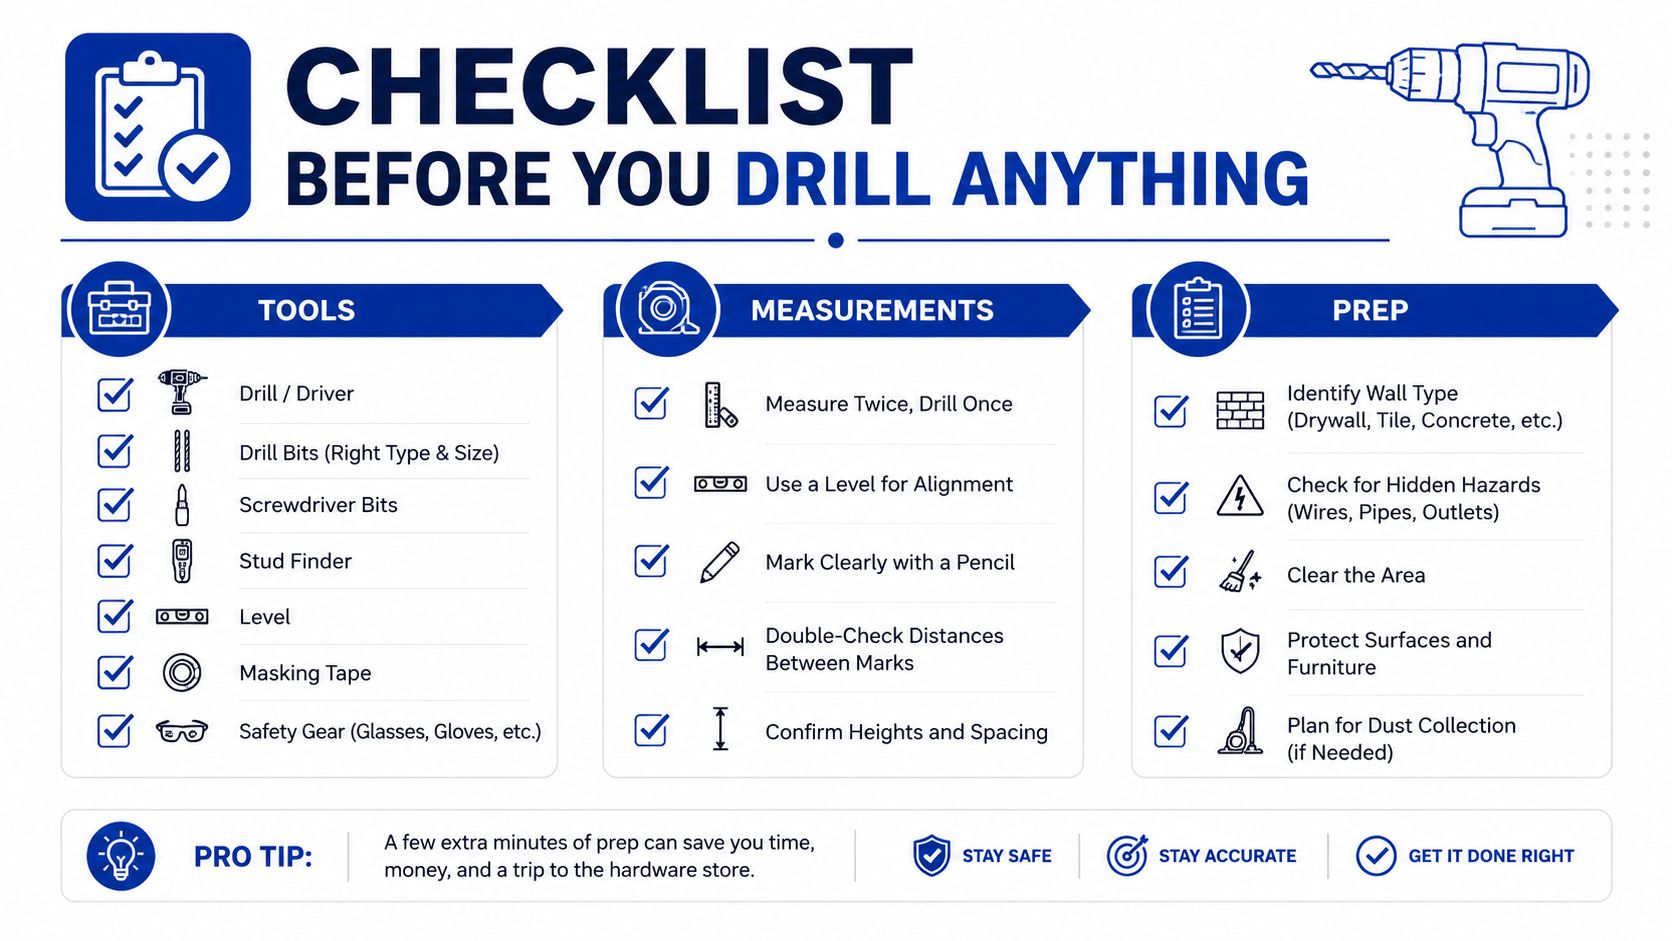
A good prep setup is boring in the best way. You want a tape measure, combination square, pencil, drill, hole saw set, chisels, screwdrivers, and the manufacturer template on the bench before you touch the door. If you're missing the template, stop and get it. Guessing on the centerline is how a clean project turns into patched wood.
Backset matters too. On many residential locksets, the common backset options are 2-3/8 inch and 2-3/4 inch, and the wrong one means the latch won't land where the strike expects it to. Door thickness and handing matter in the same way, because a lock can physically mount and still sit wrong for the door it's on. The job here is not to cut anything yet. It's to verify that the new hardware matches the old bore and the existing prep.
Mark first, drill later
The best habit is simple, measure the door centerline carefully, tape the template flat, and confirm the backset before drilling. A lot of install problems start when the template drifts half a pencil width or the tape pulls it off square. When that happens, the latch collar, rosette, and strike can all end up fighting one another.
The prep instructions for standard hardware emphasize drilling from both sides, and that's not a cosmetic preference. It helps reduce blowout and keeps the hole centered through the face of the door. Manufacturer instructions also call for aligning the latch and anti-rotation block before fastening the rosette or faceplate, which means dry-fit everything before you commit to screws (installation instructions).
If the door is old, painted over, or already patched, spend extra time on the face where the lock will sit. A few minutes of careful marking can save you from enlarging a bore that should've been left alone. That's especially true on older homes where the old hardware may have left the door just slightly out of true.
Installing a Deadbolt and Knob From Start to Finish
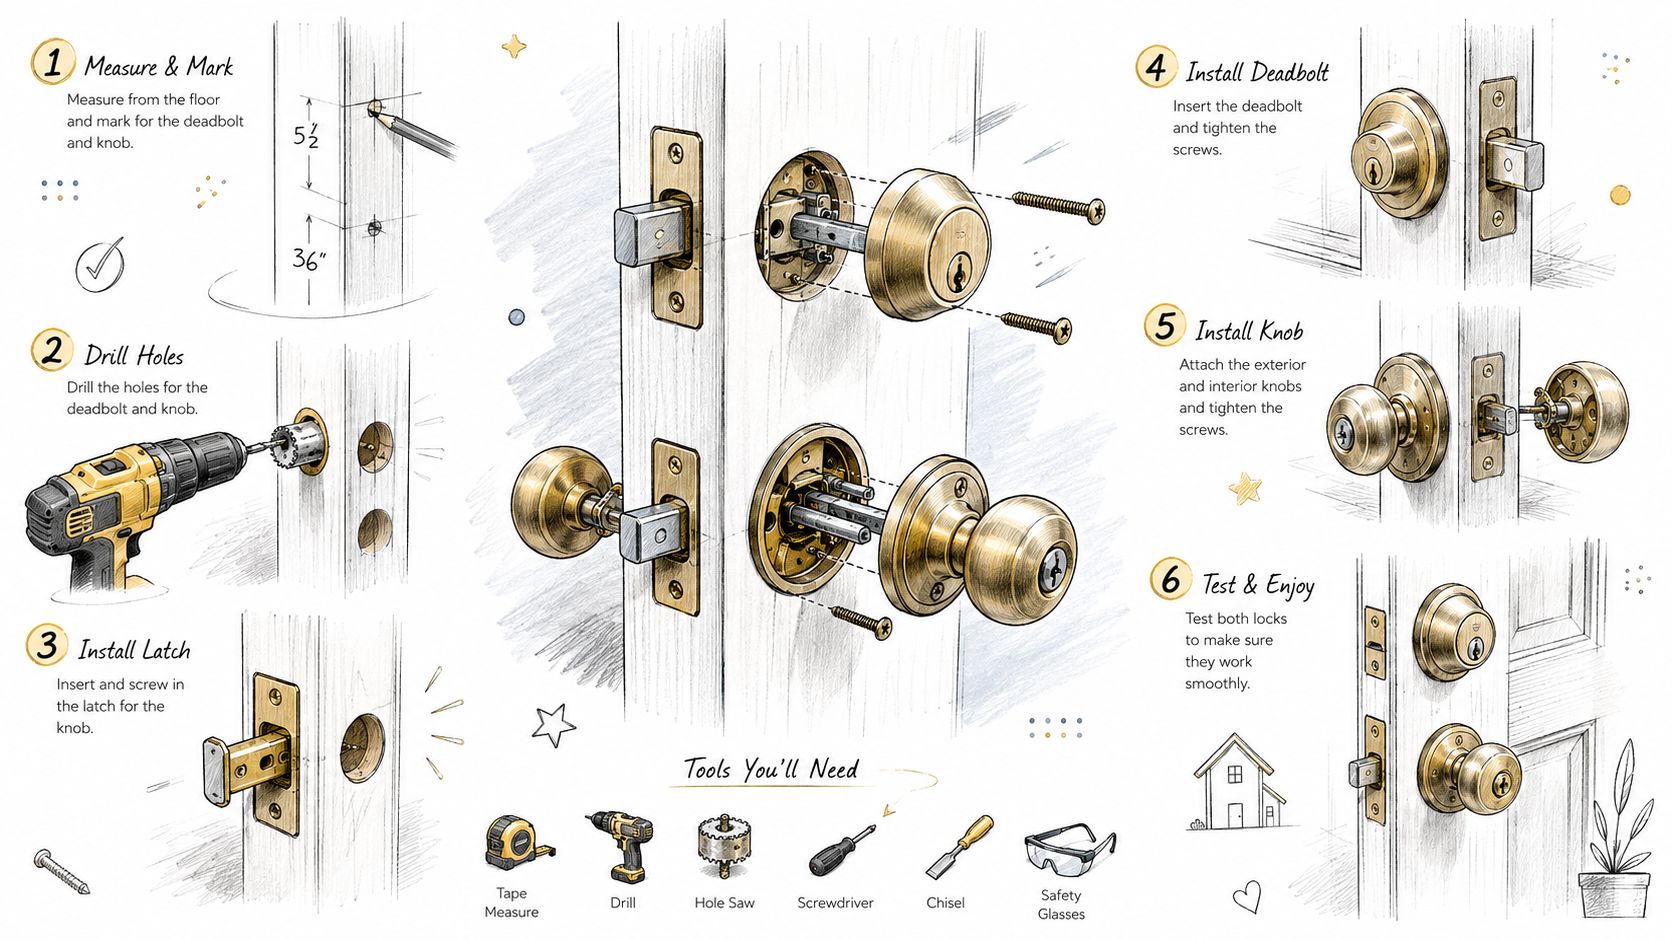
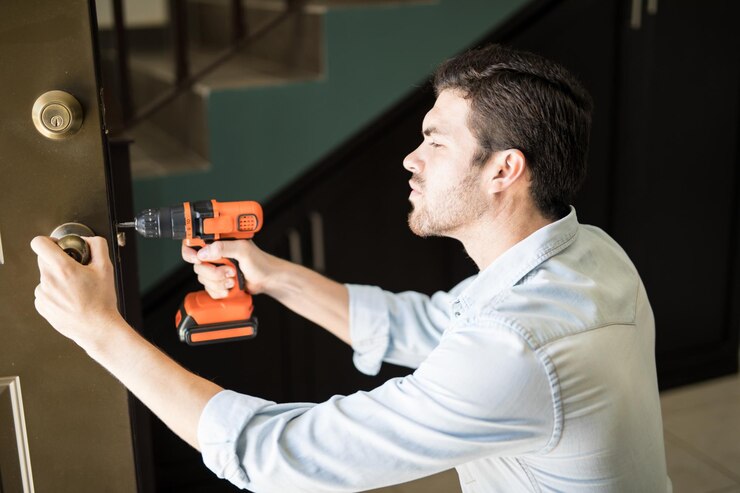
Set the template on the door at the measured centerline and tape it flat before you mark anything. Trace the cross-bore and latch bore locations, then check the backset again before a hole saw touches the door. If the old bore already matches the new hardware, use it. If it does not, stop and confirm the fit instead of trying to force the lockset into place.
Drill from both faces of the door. That keeps the hole centered and cuts down on tear-out at the edge of the bore, which matters on painted, veneered, and older slab doors. Once the holes are cut, slide the latch into place, confirm that the faceplate sits flush, and make sure the anti-rotation block or latch housing is lined up before you drive the screws.
Drill halfway from one side, then finish from the other side. That keeps the face veneer cleaner and helps the bore stay true.
After the latch is seated, bring the exterior and interior halves of the knob or deadbolt together and dry-fit them first. If the parts do not meet naturally, do not force the screws, because that usually points to a bore that is off or a latch that is not fully seated. Once the body is centered and the spindle or tailpiece is engaged, fasten the rosette or faceplate, then install the strike on the jamb and test the throw by closing the door slowly.
The strike should catch without a shove. If the door has to be lifted to make the bolt engage, the lock is only part of the problem. On older Minneapolis homes, a few millimeters of door sag, paint buildup, or a slightly shifted frame can turn a clean install into a latch issue, and the frame or hinge side may need attention before the hardware will work the way it should.
Dry-fit before final tightening
A deadbolt and knob combo can look right from a few feet away and still be wrong at the screw heads. Dry-fitting catches that before you strip screws or crack the trim. It also gives you one last chance to confirm that the latch retracts smoothly and springs back without dragging.
On a worn door, the cleanest result often comes from slowing down before the final turn of the driver. A mobile locksmith like Mena's Key can handle the hardware side and spot the geometry problems before the door gets modified the wrong way. That is often cheaper than patching a bad bore and buying a second lockset.
Choosing the Right Hardware for Your Door Type
Not every door wants the same hardware. A typical cylindrical lockset fits many residential doors, but older Minneapolis houses often hide a different story behind the trim, especially when the original prep was made for a mortise body. Commercial and multi-family openings add another layer, because the hardware has to work with egress, closers, and the rest of the opening assembly.
Here's the quick match-up that keeps the decision sane.
| Door Hardware Types at a Glance | Best Fit | Prep Required | DIY Difficulty |
|---|---|---|---|
| Cylindrical lockset | Standard residential interior or exterior doors | Cross-bore, latch bore, strike alignment | Moderate |
| Mortise lock | Older homes, commercial doors, premium hardware retrofits | Pocket cut in the door, precise faceplate and trim fit | Hard |
| Exit device | Commercial and multi-family egress doors | Door size, mounting surface, coordinated hardware | Hardest |
Cylindrical locksets
These are the usual knobs and levers people think of first. They're the most approachable for a homeowner because the prep is familiar, the parts are easy to identify, and the replacement path is usually straightforward when the existing bore is standard. The catch is that a standard-looking door can still have nonstandard geometry, so a “simple” swap can become a fit problem fast.
Mortise locks and exit devices
Mortise hardware belongs in a different conversation. The body sits inside a pocket cut into the door, so the installation depends on precise layout and a clean existing opening. Exit devices are even less forgiving, because they're built for commercial and multi-family egress conditions, not casual weekend experimentation. If the door already had one, replacing it might still be a specialty job.
Pick hardware for the door you actually have, not the door you wish you had.
That's also where finish, handing, and existing prep become more important than the showroom label. A beautiful lever set that doesn't match the bore or the latch location is just expensive frustration. On a retrofit, fit beats style.
Why a Fresh Install Still Fails to Latch Properly
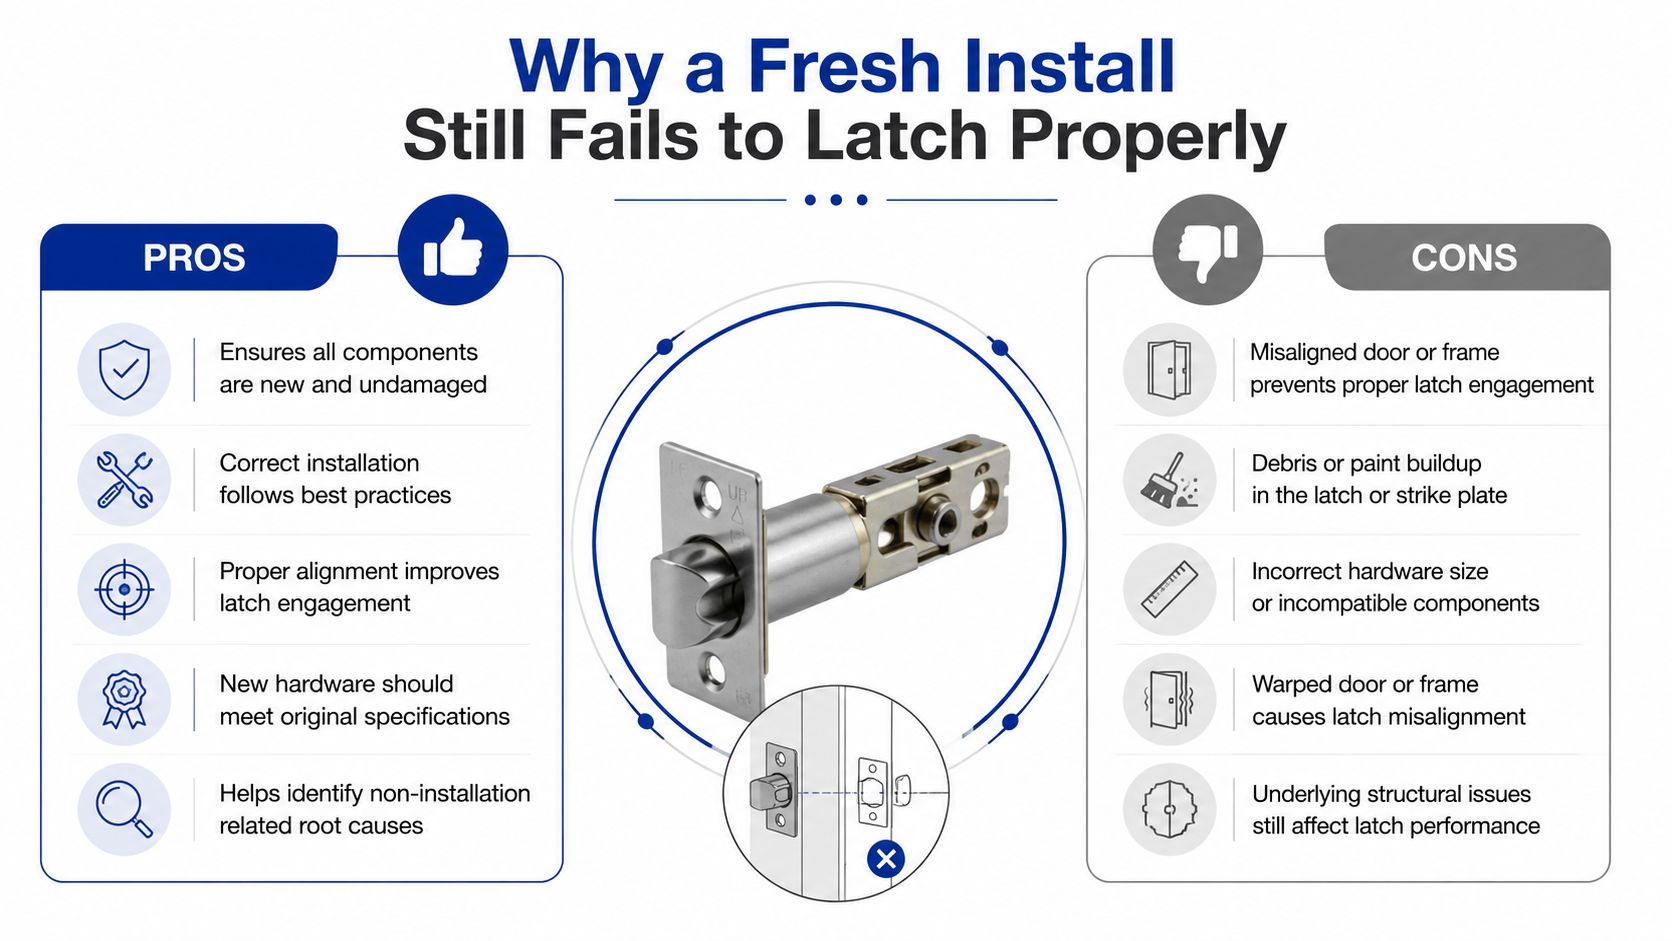
The new lock goes in, the screws are tight, and the deadbolt still scrapes. That failure usually isn't a bad part. It's a system-fit problem somewhere else in the opening.
The most common culprits are hinge wear, door sag, strike misalignment, and gaps that aren't equal from top to bottom. Professional guidance for larger and commercial openings treats gap equalization and door centering as part of the install itself, not as an afterthought, and commercial ironmongery sequences place hinges, mortise lock, strike or keep, closer, seals, and stops in a deliberate order (system installation guidance). That tells you something important. The lock works as part of an opening system, not as a standalone object.
How to diagnose the real problem
If the latch hits high, look at the hinge side first. If the door rubs at the top corner, the top hinge may be loose or the frame may have shifted. If the bolt enters the strike but the door still feels forced, the strike may need to be moved or shimmed rather than replaced.
You can often confirm sag with a simple level placed against the door edge. If the door isn't centered between the jambs, hardware alignment won't stay consistent, no matter how carefully the lock was mounted. That's why a lot of “bad lock” complaints turn out to be frame and hinge issues once you look closely.
What to change before buying new parts
Don't re-drill a strike just because the first close feels stiff. Check the hinge screws, check the gap, and verify that the bolt enters the strike cleanly when the door is closed without force. A small correction at the hinge or strike often solves the problem without turning the door into a patch job.
If the door closes but slams, binds, or misses the latch by a fraction, the hardware isn't the only variable. The door leaf and frame are part of the failure. That's the point many install guides skip, and it's why so many fresh installs still feel wrong after the final screw goes in.
Code, Safety, and the Line You Should Not Cross as a DIYer
There's a clear line between a homeowner's deadbolt swap and a regulated opening. Commercial doors, fire-rated doors, and multi-family egress doors can require listed hardware and correct clearances, and exit devices are not just bigger versions of a residential latch. They're part of a safety system, which is why the wrong retrofit can create a real problem even if the door “looks fine.”
When to stop and hand it off
If the opening is a commercial fire door, a multi-unit entry, or an accessibility upgrade, the job stops being a casual DIY project. Those installs need the right hardware, the right fit, and the right coordination with the door and frame. A homeowner can absolutely handle a basic residential deadbolt if the prep is standard, but mortise retrofits and exit devices belong to someone who works those systems every day.
The conservative rule is simple.
- Stop on fire-rated or commercial openings: The door is part of a life-safety assembly, not just a place to mount hardware.
- Stop on mortise retrofits: The pocket, trim, and faceplate details can turn a small mismatch into a damaged door.
- Stop when the bore is already off-spec: Forcing the latch or widening the hole can create a bigger repair than the original problem.
- Stop if the door must be modified for fit: Once you're changing the door itself, the project has left basic replacement territory.
Never force a misaligned latch. If it doesn't seat cleanly, something else is wrong.
That advice still applies on a normal residential swap. Keep the drill square, don't rush the bore, and test every moving part before you tighten the final screws. A careful install is slower, but it's the one that survives winter swelling, daily use, and all the little shifts that older doors go through.
Maintenance, Quick FAQ, and When to Call a Twin Cities Locksmith
A good install still needs routine attention. Check the strike screws now and then, especially on older doors where vibration and seasonal movement can loosen them. A light lubricant on the moving parts helps the latch stay smooth, and a seasonal look at swelling, rubbing, or a door that suddenly feels heavy to close can catch trouble before the lock starts fighting the frame.
If the hinge screws are no longer biting cleanly, longer screws in the hinge can often pull the door back into a firmer position on the frame. That does not solve every problem, but it is one of the first practical fixes when a door starts sagging a little. If the door is binding because the weather changed, wait for the wood to settle before you start cutting or moving the strike.
A lot of older Minneapolis homes turn this into a fit issue rather than a hardware issue. The bore might be close, but close is not enough when the latch only has a few millimeters of margin. A door, frame, and lockset have to work together, and on an older opening, that usually means checking alignment before assuming the new hardware is wrong.
Quick FAQ
How long does a typical install take?
A standard residential deadbolt and knob swap is usually straightforward when the prep already matches. Any mismatch in the bore, strike, or handing slows the job down. On older doors, the fix often takes longer than the replacement.
Should I rekey or replace after moving in?
If you do not know who still has a key, rekeying is often the cleaner option when the hardware itself is in good shape. Replace the hardware when it is worn, mismatched, or does not fit the door correctly.
What if a key breaks in the lock?
Stop turning the cylinder and do not jam the rest of the key deeper. If the fragment does not come out easily, that is a good time to bring in a locksmith instead of turning a small problem into a damaged cylinder.
For homeowners in the Minneapolis–Saint Paul area, the hard calls are usually the same ones every week. Mortise retrofits, commercial exit devices, multi-unit rekeying, and doors that need modification to fit the hardware rather than the other way around all call for a better look at the opening. If that is where your project has landed, Mena's Key is a local option for on-site help, clear estimates, and door hardware service that fits the opening instead of fighting it.
If your door is already out of square, the strike will not catch, or the old prep does not match the new lockset, do not keep forcing the install. Call a Twin Cities locksmith for help with the hardware, the fit, and the on-site adjustments that turn a stubborn door into one that closes cleanly.